Step-by-step guide to notify a Google Calendar event with Whatsapp
Alex de Pablos Lopez9 min
Have you ever wished that Google Calendar would notify you of an upcoming event directly through Whatsapp? Although Google Calendar does not offer this option natively, in this article, I’ll show you how to create your own system to notify a Google Calendar event with Whatsapp.
This tool will allow you to receive a Whatsapp message every time a Google Calendar event or reminder is about to happen. With your own Whatsapp Calendar notification system in operation, you’ll never forget an important event again.
I’m going to present you how to use Twilio and Google Sheets with a small script in .gs to send Whatsapp messages automatically. Although it will require a bit of effort, I assure you it’s worth it. Let’s get to it!
Quick Note: If you’re looking for a more professional and hassle-free solution to notify Google Calendar events via Whatsapp, I have a special recommendation for you at the end of this article. Don’t miss it!
Steps to notify a Google Calendar event with Whatsapp
We will rely on Twilio and Google Sheets to achieve our goal, so the first thing you will need is to have an account on Twilio, make some small configurations, and save a couple of data.
Twilio configuration
Register process
The Twilio registration process is pretty straightforward. They will ask you for your name, surname, email, password and accept their policy.
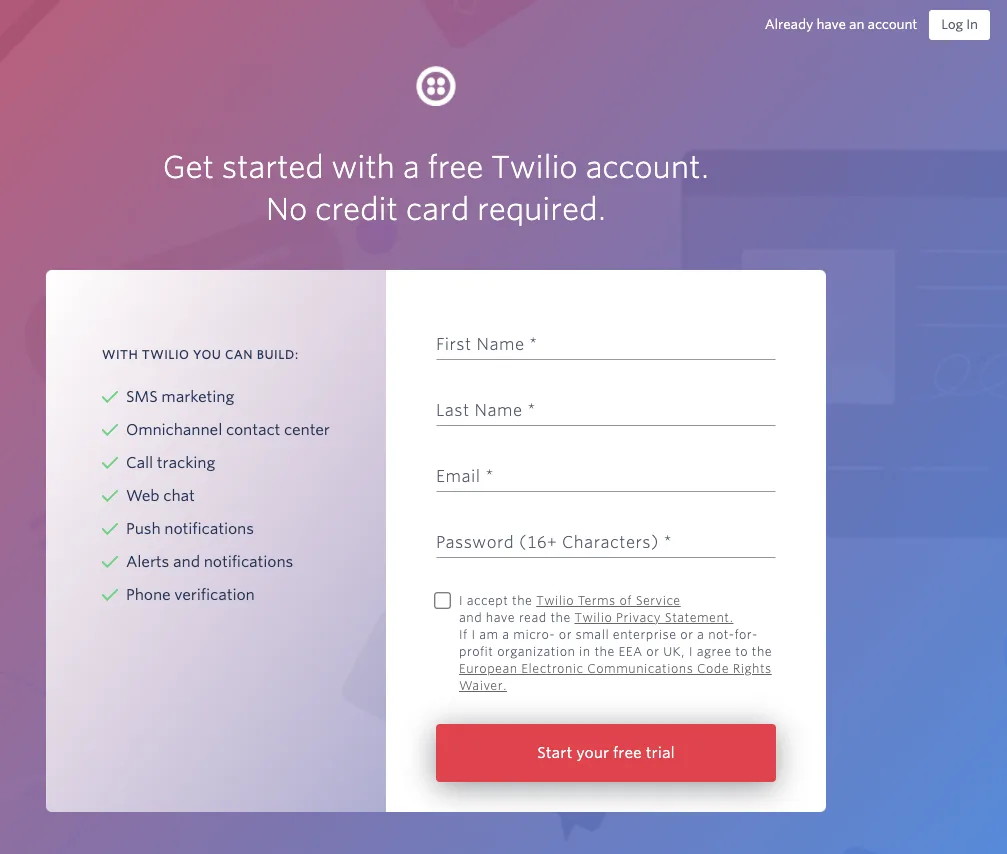
Although it is true that to choose the password you may sweat and blood, because they do not make it easy.
It has to be more than 16 characters, not have 3 characters in a row, digits, not contain certain words … etc.
You may have already read it in some other post on my blog, but I am a huge fan of good password managers. In my case I use 1Password and it gives me great mental relief to know that everything is under control.
Once you click in the button, you will need to verify your email.
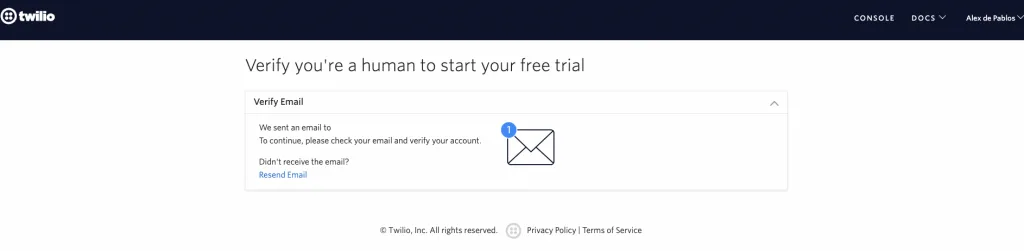
You will have an email like this one in your inbox.
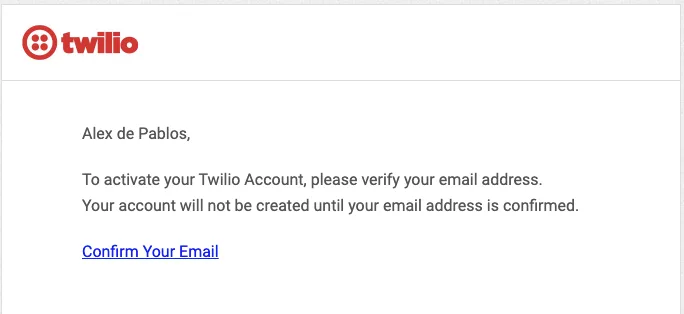
You just need to click on the link and you will be verified.
The next step is to verify the phone number.
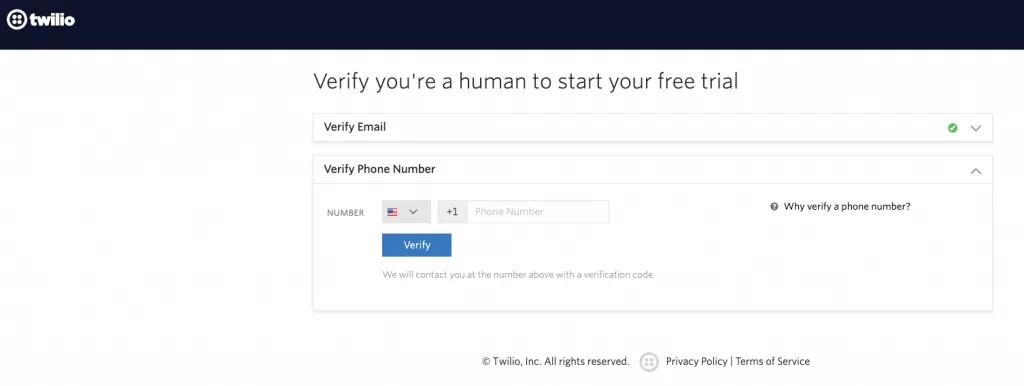
When you have it, Twilio will welcome you and make you fill out a small form.
Here you have how I completed the form at that time.
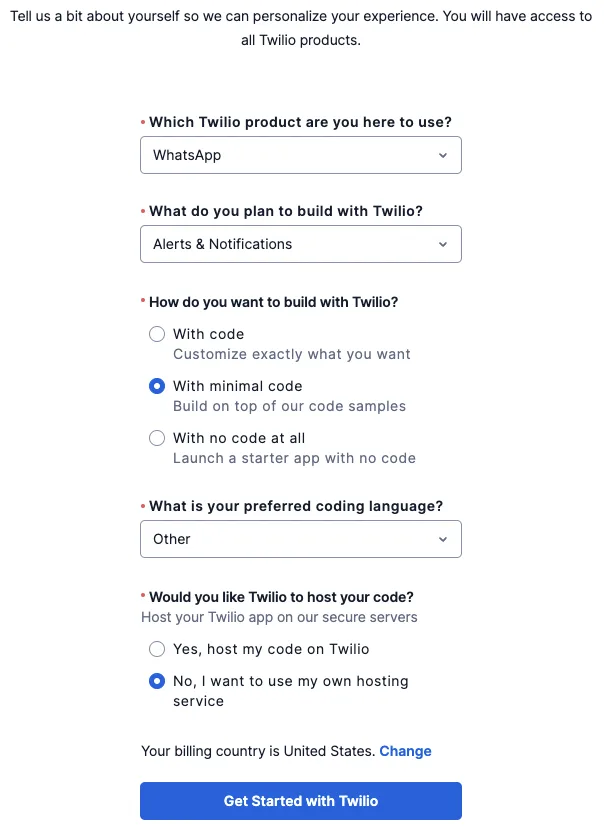
When you click the Get started with Twilio button, your adventure in his world begins.
By default Twilio creates a My first Twilio account for you. You can use this if you want, or also create a new account. As you prefer.
Sandbox activation
If you have followed the previous steps, you will have this popup on the screen.
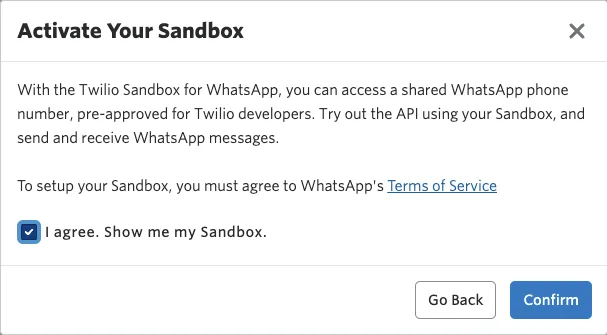
You have to accept and confirm to continue with the activation.
Sandbox activation is necessary if you want to start sending messages with a number that is already pre-approved by the Twilio developers.
To use your own number, you need to go through another process that you can find here.
When confirming the popup, you will find the following screen to proceed with the activation.
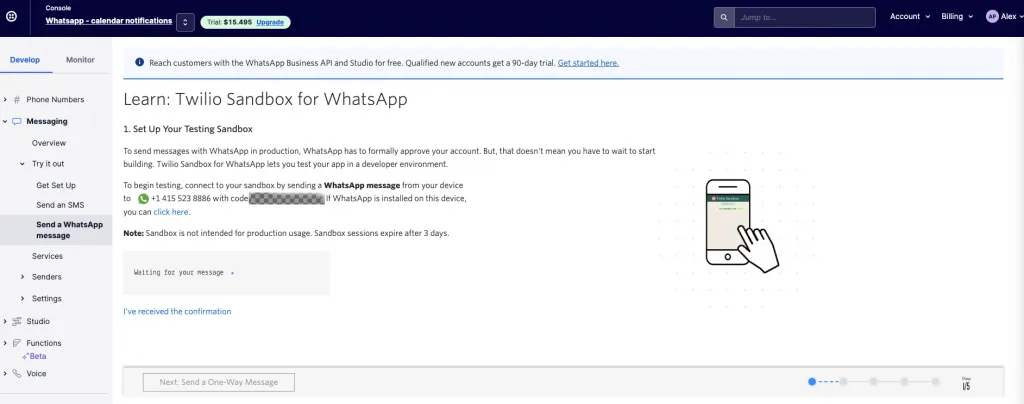
This is the link that takes you directly to that section in Twilio.
Simply send a WhatsApp to that number, with the code indicated in bold and … voila! You already have the Sandbox active and you can start using it!
Identify your Account SID and Auth Token
Access your Twilio console and select the application you have been working with.
Once there, you can take a look at both data. The ACCOUNT SID is clear, and you will need to click the Show button to see the AUTH TOKEN.
Google Configuration
We will use a Google Sheet to indicate the data and to create the script in .gs that will facilitate the sending of WhatsApp.
Google Sheet
In this link I leave you a template that you can use.
You will not be able to edit it, but you can make a copy, store it in your Drive and edit it freely.
The template has everything you need so that you only have to enter your information and you can start sending WhatsApp.
Warning: If you don’t want to touch any code, it is important that you keep the same tab names, and that you keep the same positions where the data is inserted.
Twilio TAB
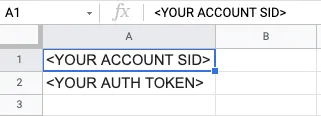
Substitute in cell A1 the value of your ACCOUNT SID and in cell A2 the value of your AUTH TOKEN. Take a look [up here](<#Identifica tu Account SID y del Auth Token>) if you can’t remember where to access that data.
contacts TAB
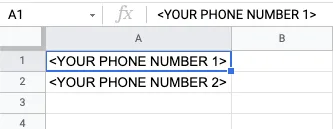
Add in the To column each of the numbers to which you want the notification to be sent.
If you want to invite other numbers using your sandbox, just follow the steps indicated in the Twilio documentation. Once you have it, you can enter as many numbers as you want in cells A2, A3 … AN.
Data TAB
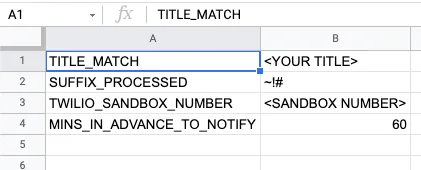
The value of cell B1 specifies the title of the event that you are interested in monitoring and with which you will receive the WhatsApp. The script will search among your events on your calendar today, an event that exactly matches the value you include in that cell.
The value in cell B2 specifies the suffix that will be used to let the application know that the event has already been processed. You can change it if you prefer, but the template value is adequate.
The value in cell B3 is the Twilio Sandbox phone. Enter it without + in front of it, but with the country code. Ex: 34777889900 if your mobile is from Spain. I leave you a link with the country codes in case you need it.
The value in cell B4 indicates the minutes that there must be a difference between the start time of the Calendar event and the execution time for the WhatsApp to be sent.
With an example perhaps it will be better understood:
If the execution is at 21:00 and the event you want to monitor is in your calendar at 10:30 p.m., the notification will not be sent until the execution is not done after 9:30 p.m., because currently the value is 60 minutes.
Clearer now? I hope so.
Twilio TAB
If you are curious and want to take a look at the code, you can do so by clicking on the Script editor option that hangs from Tools.
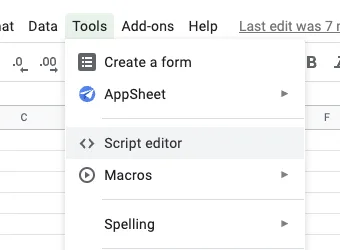
Once there, a new tab will appear in the browser with something similar to this.
You can change the name to whatever you want if you prefer, or leave it as is.
From that screen, you can run the script manually by clicking Run and test if everything works as it should.
If any problem arises, you can see it in the execution logs that appear at the bottom.

You can debug your code at any time by adding breakpoints and executing the code step by step.
And of course, modify what you deem appropriate in the code.
If something breaks, you always have the template available to make another copy.
You also have the code on Github in case you prefer to clone the project or just see it from there.
AUTOMATE THE SCRIPT
At this point we have everything we need to manually execute the process and whether or not to send the notification via WhatsApp depending on the conditions at the time of execution.
But if what you want is not to have to worry about anything and simply receive WhatsApp when required, we will need to take one more step and automate the execution of the process.
With Google Script it will not be complicated at all, you’ll see!
Select the Triggers option from the menu.
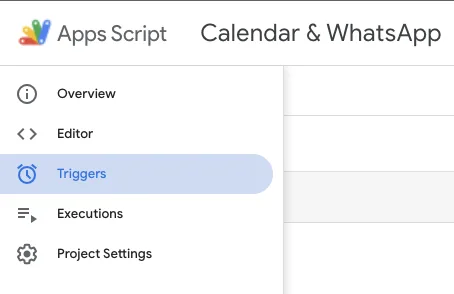
Then to the Add Trigger button, bottom right.
And fill in the form like the following:
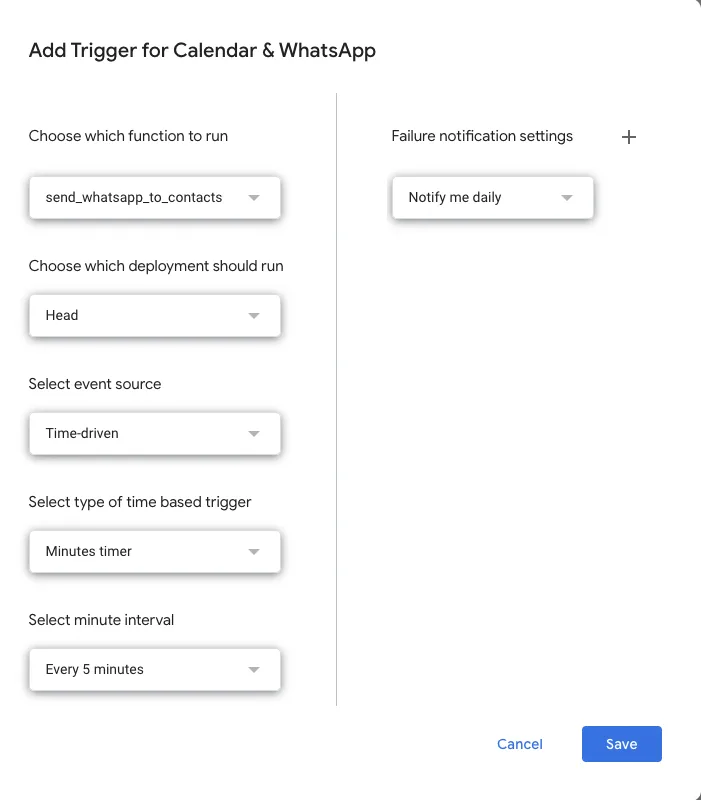
In such a way that we are configuring the execution of the send_whatsapp_to_contacts method every 5 minutes.
Demo – Video how to notify a Google Calendar event using Whatsapp
I leave you a small video where I show how the process works once configured. Right now it is only in Spanish, but hopefully soon I can have it also in English.
VIDEO DEMO – Google Calendar Whatsapp
Looking for a More Professional and Hassle-Free Solution?
I understand that not everyone has the time or inclination to set up this entire system from scratch. And perhaps it might not fully adapt to the needs you might have for your business. If you’re in search of a more professional, user-friendly solution that doesn’t require diving into code, I have a recommendation for you: Confirmafy.
Why Confirmafy?
-
Full Automation: Confirmafy takes care of automatically confirming appointments with your clients via WhatsApp. Minimize unexpected client no-shows and boost your earnings.
-
Google Calendar Integration: You can sync your Google Calendar with Confirmafy and let the tool handle the rest. 24 hours before the appointment, Confirmafy will send a confirmation message to your client.
-
Real-time Feedback: You’ll know in real-time if your client has confirmed or canceled the appointment, allowing you to manage your schedule more efficiently.
-
Positive Reviews: Hundreds of users, from medical clinics to trainers and private tutors, have given Confirmafy a 5-star rating, highlighting its ease of use and efficiency.
Moreover, if you decide to give it a try and sign up through my referral link, you won’t just be getting a powerful tool for your business. You’ll also be supporting my work, as I’ll receive a small percentage of the recurring revenue from the leads I bring in.
So, if you’re looking for a more professional and convenient solution without getting your hands too dirty, I invite you to check out Confirmafy. I’m sure you’ll love it!
Conclusion
As you can see, notifying Google Calendar events with Whatsapp is entirely possible with a little effort and the right tools. Whether you choose to use Twilio and Google Sheets or Python and PyWhatKit, you now have an effective way to ensure you never miss an important event.
I hope this article has been useful to you and has provided you with the knowledge you need to set up your own Whatsapp notifications for Google Calendar. If you have any questions or run into any problems, don’t hesitate to leave a comment. I’m here to help you.
Remember, learning is a journey, not a destination. So keep exploring, keep asking, keep learning. And while you do, don’t forget to enjoy the journey. If you liked this article, I invite you to explore more content on my blog. I have a variety of guides and tutorials on technology and software development that might interest you. Until next time!