Software engineering
Connect iOS shortcut with Notion to track your expenses
Alex de Pablos Lopez15 min
There are a lot of use cases where you can connect iOS shortcut with Notion in a useful way.
This time I needed something to track my expenses, and this is what we are going to talk here. So, if you have the same need, or you simply want to know how you could connect your Notion with iOS, keep reading below and pay attention.
There are tons of utilities, apps and ways to have your expenses tracked. There are even apps which do that automatically like mint or some other bank applications.
But I wanted some things that were a must:
-
I wanted to be the one deciding what was what. If I pay for something to fix at home I would like to categorize it like I prefer and not to leave that decision to any app.
-
I wanted something to be accesible with one click from my phone, since it is something I always have close when I buy anything.
-
I did not want to complicate myself doing any super custom development with a native iOS app or code which would need to be deployed in an infrastructure in the Cloud to work.
So… I came to the point where creating somehow an integration between Notion and my iPhone would be a very good option.
And researching a bit about that, I came to the iOS Shortcut world.
Create an iOS Shortcut to connect with Notion and feed a table with each expense I was doing was exactly was I needed.
Definition of the tracking expenses tool
You already have a high level overview of what is this about, but let me try to define the final product even better.
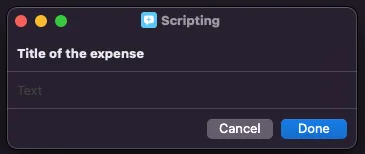
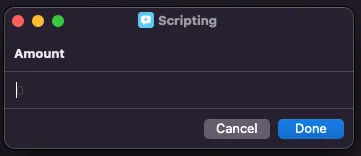
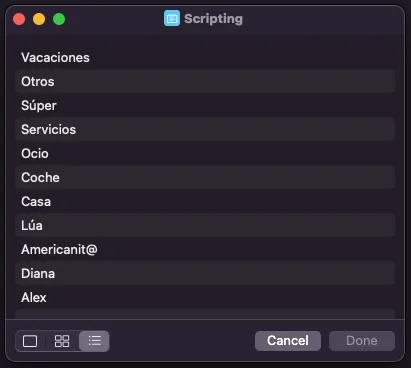
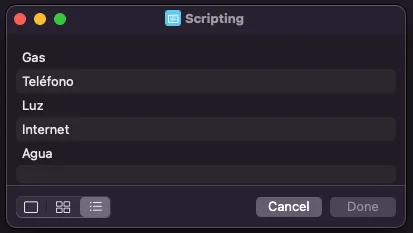
The final idea is having in the main screen in my iPhone an icon which will execute the shortcut. So, executing it the flow will be:
- Prompt asking for the title of the expense.
- Prompt asking for the amount of the expense.
- Prompt asking for the category of the expense.
- Based on the category election, prompt to specify the subcategory.
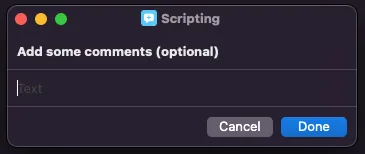
- Prompt to ask for some additional comments.
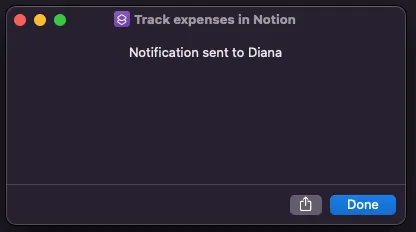
- Prompt to let the user know who the notification was sent to.
Requirements
-
A Notion account.
-
A Notion database for the tracking.
-
A Notion database for the categories and subcategories relationship.
-
Prepare Notion to be used from an iOS shortcut.
-
Some knowledge about the iOS shortcuts and how they work. It is not mandatory but highly recommended.
-
The actual iOS Shortcut to track expenses in Notion.
Get Notion
If you still do not have Notion, you will need it, so, go for it!
Notion allows us to be used either from a mobile app or from their web site.
Whatever option you’d prefer, you will need to sign in.
Go to https://www.notion.so/ (opens in a new tab) and click on the Get Notion free button.
Once you do that, you will simply need to Signup either using an email or using a single sign on with your Google or Apple account.
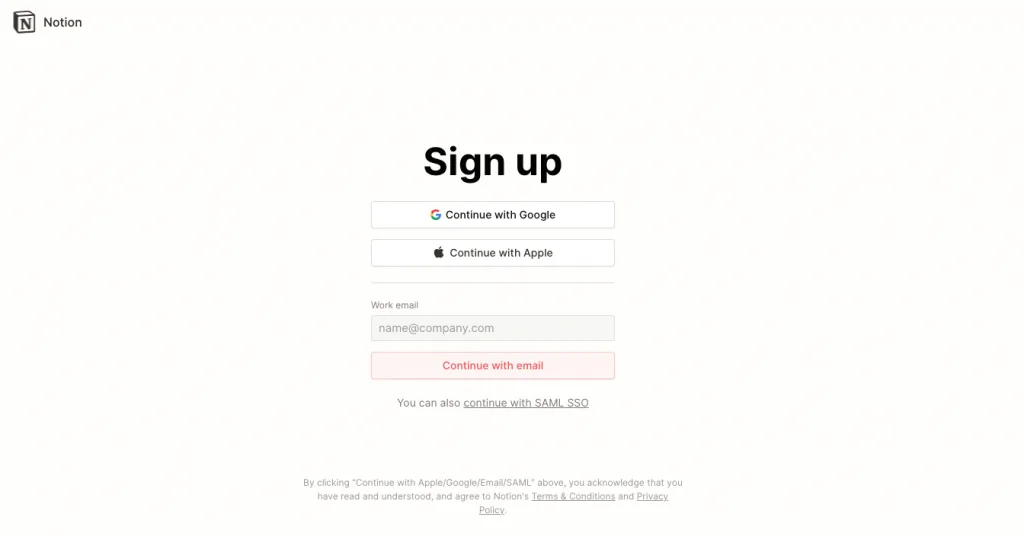
I usually prefer to introduce my email manually. If you do so, you will get some screen like this one
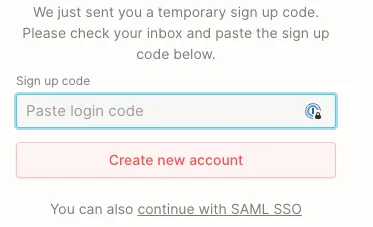
So you will need to go to your inbox and paste that login code.
Once you introduce it and click on the Create new account button, you will be redirected to this other screen
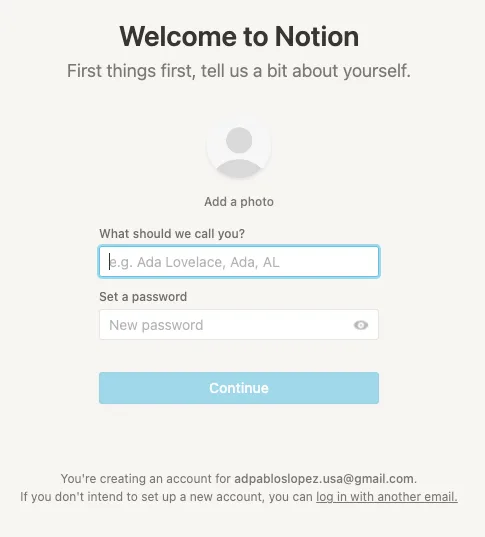
Introduce the information requested and you will be asked for some other things. You can always skip it if you want.
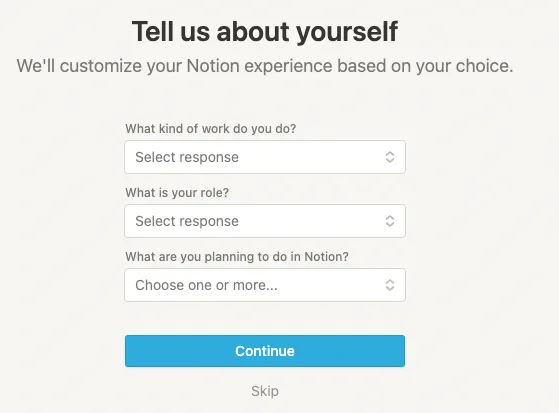
The next step if you skip that is where they offer you their free plan and also the pay one, which is actually a Try for free, and then, I guess you will pay after some time. In my case, and probably yours, you just need the free one.
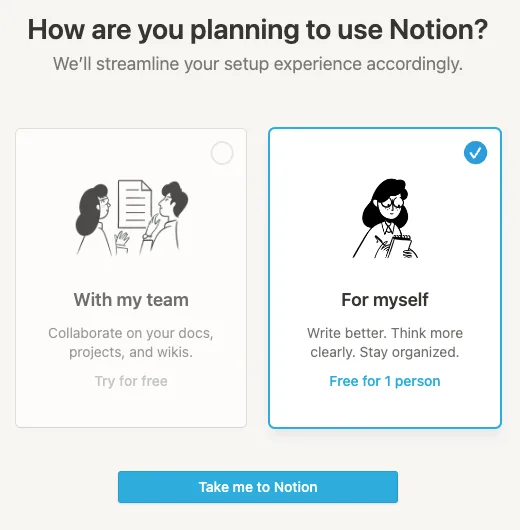
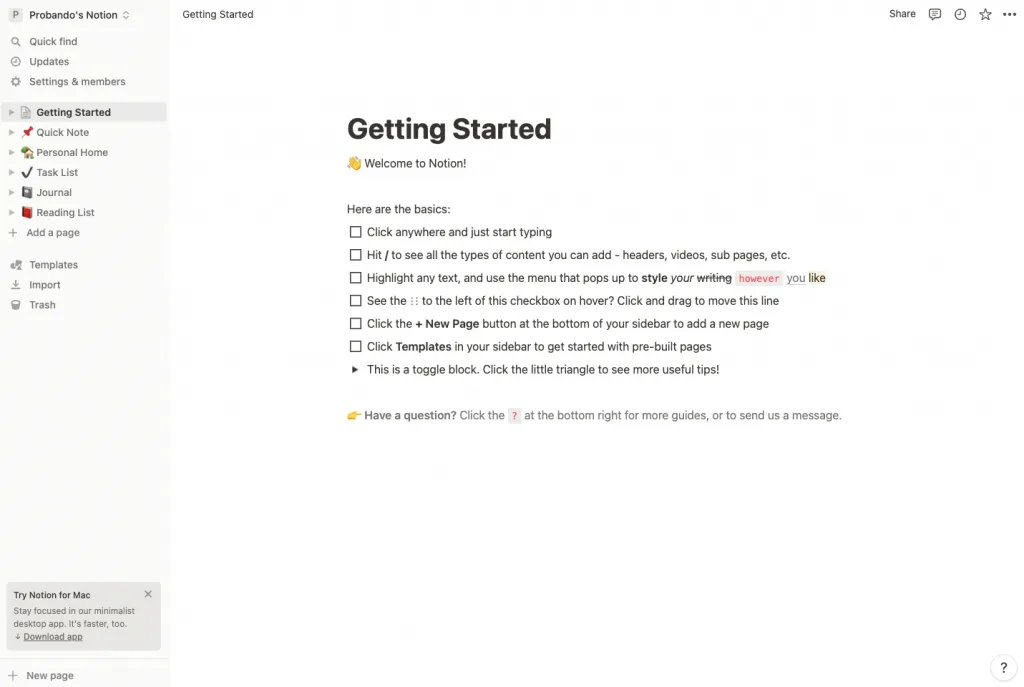
And when you click on the Take me to Notion… that is it! Find below how it should look for you.
Create the Notion databases
As mentioned before, we will need 2 databases for this tool to work as it is.
- The tracking database
This is where all the expenses records are going to be stored.
- The categories and subcategories relationship database
This is where we will define which are the categories and subcategories we will need to label our expenses. The iOS shortcut will have this data handy to show the user just the subcategories which belong to the category previously selected.
How to create a new database in Notion
- Create your new page in Notion where you want your table database to be set. Just clicking in the Add a page option in the Notion menu on the left will be enough.

-
Choose a title for your new page, introduce the text you want to be there (if any).
-
You will need to add a Table view Database. Just click in the + button to add a new block and then select that Table view option.
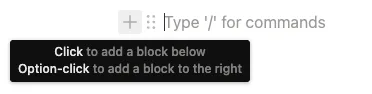
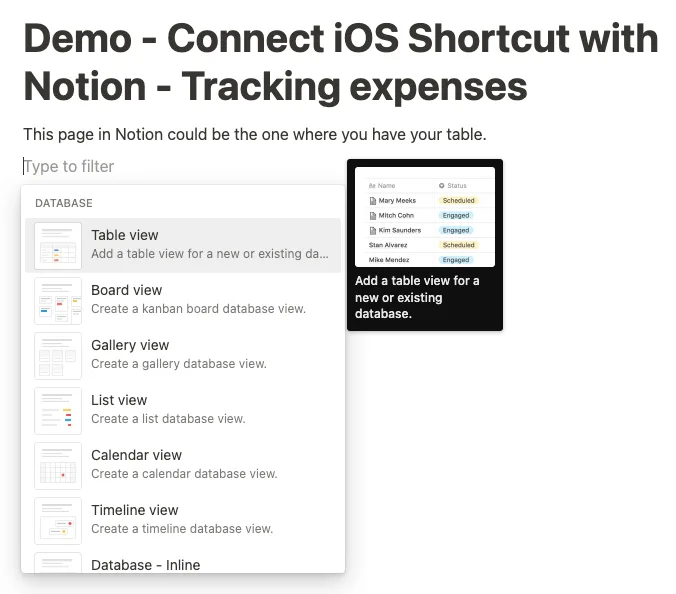
- Select New database since we do not have any other datasource.
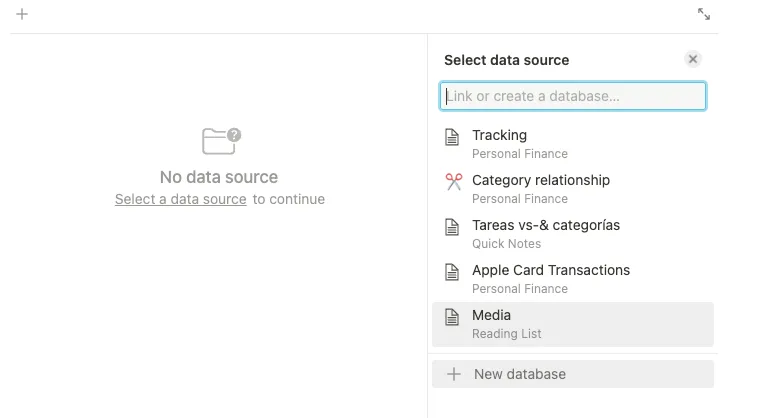
- Choose a name for your new table, and start creating the columns you need with their specific data type.
How our two needed databases face
The Notion template that accompanied this tutorial was not publicly accessible when checked on September 7, 2026. The example below describes the relationship between categories and subcategories so you can recreate it in your own database.
In this example, the iOS shortcut shows the categories Category1, Category2 and Category3, and depending on that category selected, then it will show the subcategories:
-
Subcategory1, Subcategory4, Subcategory5 if Category1 was selected previously
-
Subcategory2 if Category2 was the chose one.
-
Subcategory3 if Category3 was selected.
Prepare Notion to be used from an iOS Shortcut
Now that you have your tables created in Notion, you should configure them to make them accessible from the iOS shortcut we will create.
To do that we will need to create what is called an Integration and link it to the tables we created.
Lets go for it!
To create a new Integration you should go to https://www.notion.so/my-integrations (opens in a new tab) and click in New Integration link.
Fill the form with the name you prefer and leave its options it is shown in image below.
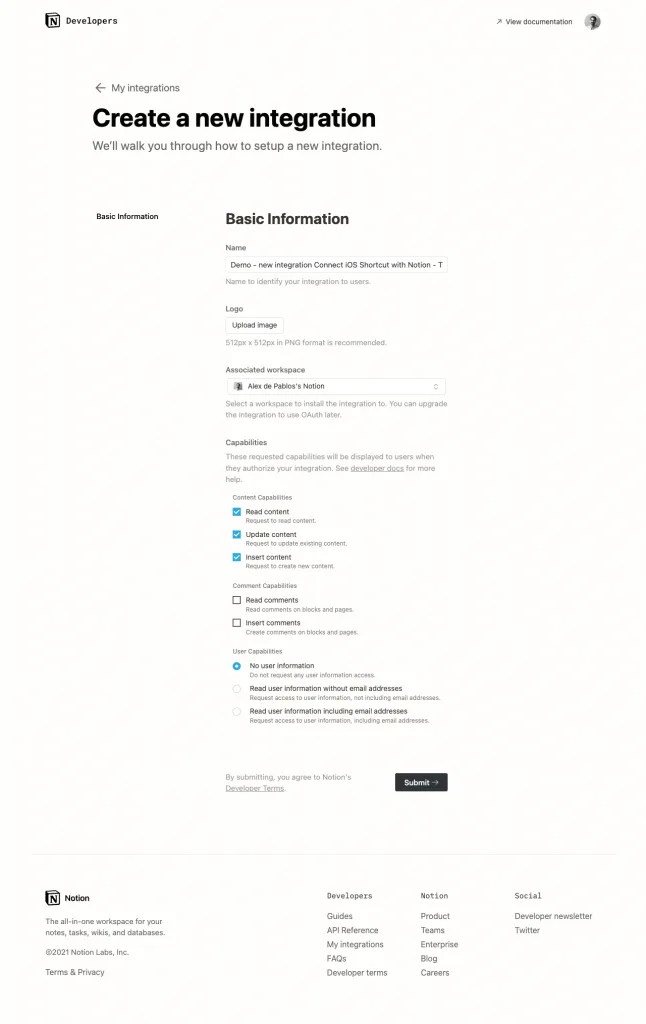
- Click in the Submit button and … you will have your new Integration created! The real important point is to get the Internal Integration Token. So have that data handy.
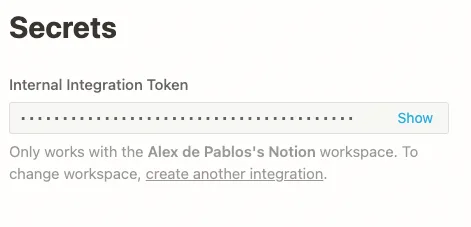
-
You will have to do the following process twice. One for the tracking table and other one for the categories and subcategories one.
-
Go to your table database page in Notion.
-
Click in the Share link (top right corner). And in there, you should be able to add the new integration you have just created.
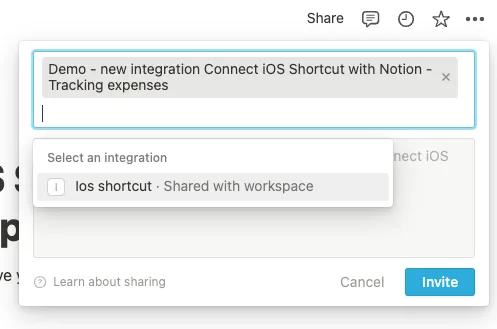
- Click in the Invite button and that is it! You now have your Notion database ready to be accesible from the outside.
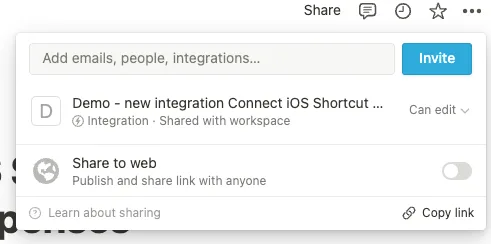
What is the Notion API
Notion API is the Application Programming Interface (API) exposed to the public so that anyone could add, update or delete information without the need of being using the Notion App directly.
Any API is composed by a group of what is called endpoints.
Each endpoint performs a different action.
So, in the end, if you are looking how to add new records in a Database in Notion from, for instance, an iOS Shortcut, you could do that simply calling from the iOS Shortcut, to the endpoint exposed in the Notion API to do that.
How to use the Notion API
To use the Notion API is not different to how we use any other public API.
You are not going to find a better place to know about it that its own API documentation. Here (opens in a new tab) is where they explain how to work with databases.
My favorite tool to play with APIs is Postman (opens in a new tab). It is a powerful tool, but at the same time easy enough to test quick any API manually. Give it a try and install it!
Notion APIs offers as an endpoint to include new records in a table (opens in a new tab), and that is what we exactly need.
To use that endpoint you will need:
-
To make an HTTP request to the endpoint
https://api.notion.com/v1/pagesusing the verb POST. -
Include your Internal Integration Token as a header to authenticate.
-
Include a special payload to inform about what data we want to add.
All that is reflected in the cURL Notion has as an example in its documentation
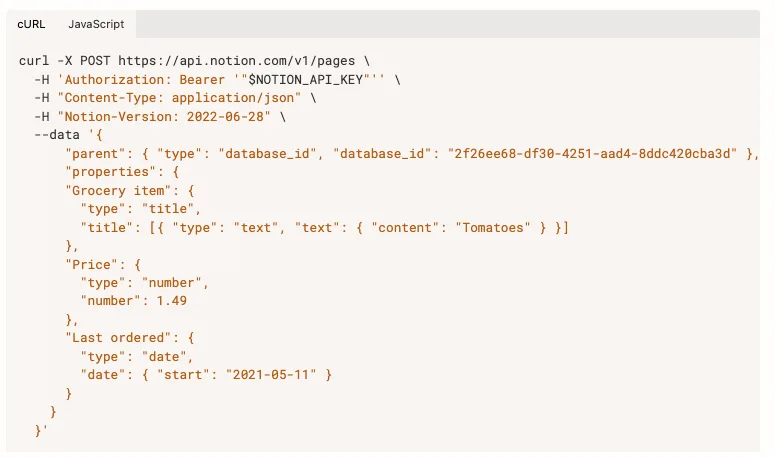
What will you need to change?
-
That $NOTION_API_KEY which is just the Internal Integration Token we generated before.
-
The database_id, which you could find following these easy steps (opens in a new tab).
-
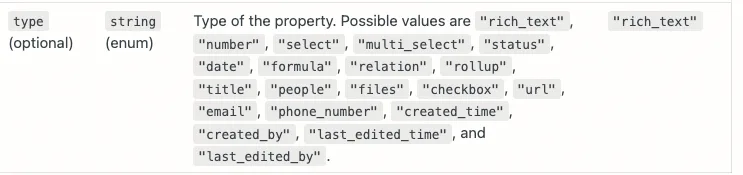
Within the properties object, you will need to specify what are your columns, what is its data type, and what is the value you want to be added.
- You have all the Property values options Notion offers in this page (opens in a new tab).
Use Notion API from iOS Shortcut
At this point you are able to add information into the Notion database from the outside using the Notion API.
Now you just need to know how to do that from an iOS Shortcut.
In fact you do not need to know in details how the iOS shortcuts work, but if you get to be familiar with it and have a bit of knowledge, it is going to help you a lot to adapt the shortcut I will share in the next section to your needs and particularities.
I am not an expert at all in the iOS shortcut world, but I just read a bit here and there and playing with it on my own, more or less I got what I needed. Having that said, I am sure there should be much better approach to do what I did, so do not blame me if so.
I am just going to expose and put together what I learned here.
These are the main points from my experience:
How to create or update an iOS shortcut
To me it was much more easier to work with the shortcuts from the mac instead of being dealing with it from the iPhone. It is just a matter of the User Interface and how comfortable I felt. So, I recommend you doing the same if you are thinking to create one.
However you can create or update a shortcut through your iPhone also. Just go to the shortcut app, select the + icon, choose a name… and start creating what you need.
What are the most important iOS shortcut Actions
There are tons of actions you can choose, and to be honest, I will tell you that I do not know the majority of them, but again, I am going to tell you what were those that I needed to understand yes or yes, and which ones I saw that were super useful.
-
Dictionaries: They store information in a key-value format. It could be a good idea to have all the sensitive information, or simple all the information we know in advance we will need along the process. in one dictionary.
- Get dictionary from: With it, you will create a new dictionary from some other output in previous steps.
-
Set variable statement: It will allow you to declare a new variable and store in it whatever other output from a previous step.
-
Repeat with each item in: It provides the possibility to make loops, iterating over a collection.
-
If: Statement you will need anytime you have to evaluate and do something if ‘x’ condition and do another thing if ‘y’ condition.
-
Lists: It is another data structure to store list of values.
-
Choose from: Statement which allows the user to choose from a list of options.
-
Ask for XXX with YYY: Action to show a dialog to the user asking him to introduce some value.
-
Text: Another data structure to store the text we need. We could use this for instance to story the request body we will use when we call the Notion API.
-
URL: It allows to declare a url to be used from other points.
-
Get contents of: This is the main statement to communicate with an API.
-
Send Message: I used that to notify to my wife each time I used my tracking expenses iOS shortcut and to be notified when she used it. It just send an SMS to whoever you indicate with the message you want.
-
Show: It shows in the screen whatever content you indicate. It could be an specific message, or the value of a variable or the output of a previous statement. For me this was a super useful action since it allowed me to debug the shortcut while I was creating it.
How to do useful things with a iOS shortcut
Let’s see some how to’s that I found interesting in my way creating the shortcut.
How to set values to a variable
When you first use almost every action, you will have it filled out by default with whatever is the output of the previous step.
However, sometimes you do not need or want that, and you want to specify any other value.
If so, you will need first to Clear it clicking in the Clear option.
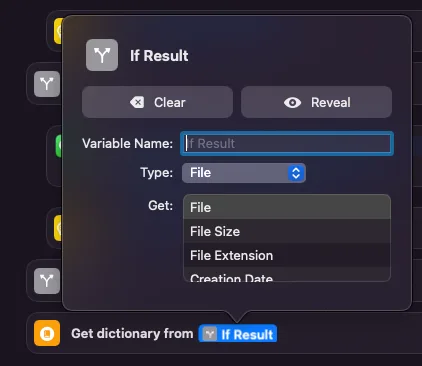
And then, clicking in the Input, you could select any variable you have already defined or use the Select Magic Variable to manually select from where you want to take the value.
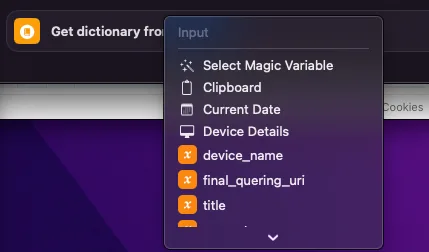
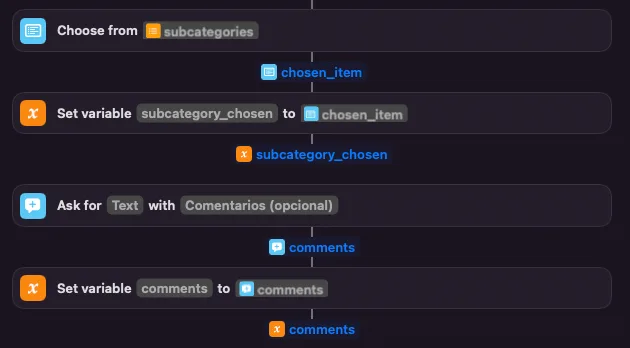
When you are in that Select Magic Variable view, the view of your shortcut will be a bit different, having some new variables which you could select. In the following screenshot you could notice chosen_item, subcategory_chosen, comments and other comments.
How to add items into a List in a iOS shortcut
Although its options are not too many within iOS, we could do some ticks to add items to a list using some other variable, adding to it, whatever it is needed.
Imagine we are in a loop and each iteration in that loop we have a different value for the variable category_name. Using the following statement.

We add the value of the variable category_name into the other variable called list_category_names.
So, when the loop is finished, we will have in the variable list_category_names all the values.
But that variable is not a List value per se, so, to have it converted to a real List you can simply do the following.
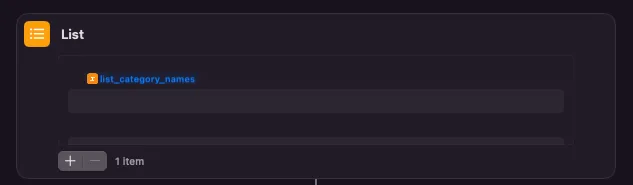
And you will have your List ready for whatever you need.
How to call an endpoint
This is the main point actually. We need to somehow call the Notion API. So, this is how we can do that.
First, declare an URL using the URL action.

Then, use the Get contents of statement, specifying the Method (GET, POST, PUT…), the Headers and the Request Body you need to communicate with the Notion API (or whatever other one you want to call).
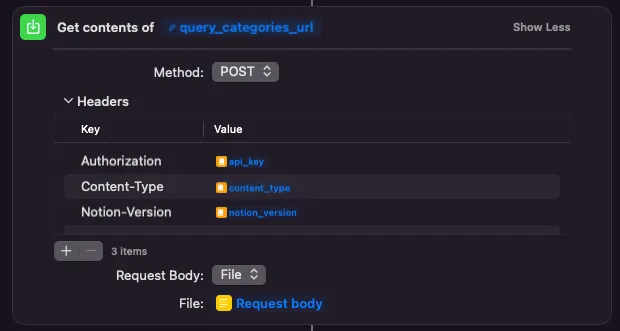
How to use the response we get when calling an endpoint
After having the response, you would probably need to do some action with that response. In that case, you can use the Dictionary structure to store the response content and then, do whatever you need with it.

Find the following as an example of use case.
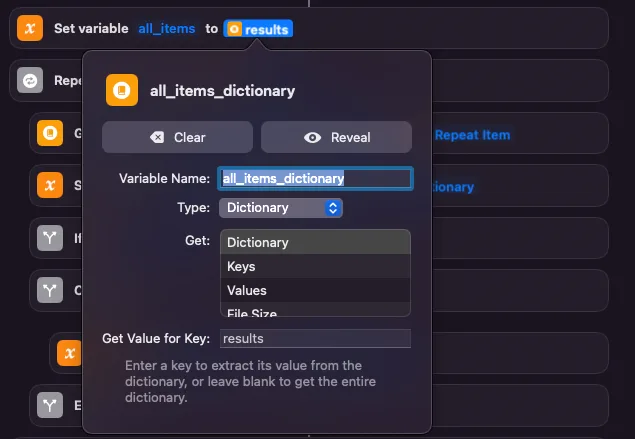
You could store in a new variable whatever is the value of the key results in the dictionary. That new variable will be called all_items.
With the Repeat with each item in action

You are going to iterate over all those items, and per item you could do…

To get the value of whatever is in the key properties.Category.select.name.
And store it in a new variable called category_name

And then to ask if that category_name value is contained within the list list_category_names
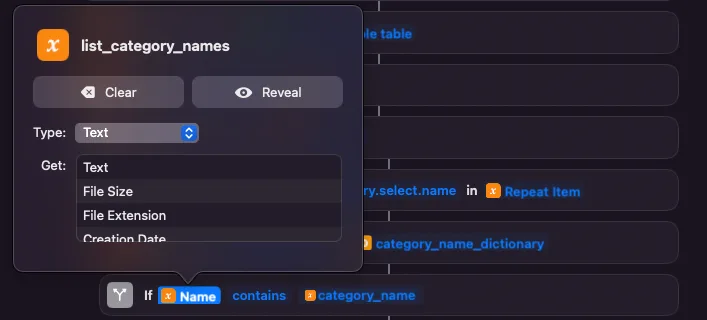
Do nothing, and other wise, to add that value into the list.
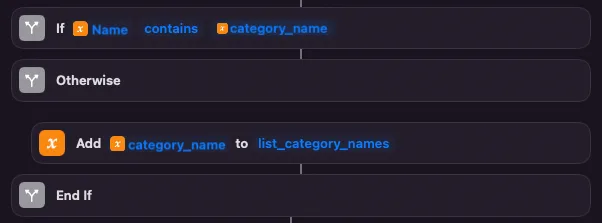
In this way, you will have in the value of the variable list_category_names all the categories name, with no duplicate values.
The iOS Shortcut to track expenses in Notion
Probably this is the main you were waiting … so… here we are!
Get the Demo – Track expenses in Notion (opens in a new tab) shortcut so you can simply have it in your iPhone and start using it.
Just remember you will need to change some few things which allow the shortcut to interact with your Notion table.
It is here where reading the whole post would help you, because you will have a better knowledge if so. But anyway let me list below what are the things you should change:
-
Identify where the Dictionary is, and change the following.
-
The key api_key. Set it with your Internal Integration Token you got when you created the Notion Integration.
-
The tracking_db key. Set it with the id of your tracking data base.
-
The categories_db key. Set it with the id of your categories data base.
-
-
Identify where the last If condition is. That block is used for the notification. Since I am sharing this shortcut with my wife, I use it to notify me when she executes it, and to notify her when its me who execute the shortcut so that we both are aware about all the changes.
-
One option is that your use case is different and you simply not need/want this. So, just remove it and that is it.
-
On the other hand if you want it like this
-
Change the [something_you_want] to have there the Name of the device your wife or you has. In my case, my wife’s iPhone is called Diana’s iPhone, so, I just put there Diana.
-
Include the Recipients you want the message to be sent in each case. In my case I set it up to my wife’s number if the condition in the if was satisfied, and mine in the Otherwise block.
-
Change the text to show within the Show action so that it is an accurate message.
-
-